In brief: Windows 11 comes with some rather strict system requirements and most notably calls for the presence of a Trusted Platform Module (TPM) 2.0 in your PC. However, there’s an easy way to go around these requirements, and it only takes a few minutes to do it yourself.
Microsoft has done an abysmal job of communicating the Windows 11 system requirements and the exact reasons behind them. Since unveiling the new operating system in June, it has only confused everyone by changing these details on the fly. Much of this confusion stems from the company’s insistence that PCs running Windows 11 need support for something called Trusted Platform Module (TPM) 2.0—a previously unheard-of security feature outside of enterprise environments.
The short of it is that Microsoft wanted to launch Windows 11 with an additional layer of security enabled by default, and TPM 2.0 was central to that strategy since the advanced security features in the new operating system depend on it. If you’re looking for an in-depth explanation of what TPM is and why Windows 11 requires it, check out our explainer.

The bad news is that Microsoft is okay with splitting the Windows user base with this requirement, even though Windows 11 comes with some important quality of life improvements over Windows 10. The good news is that if you want to run Windows 11, you can easily bypass it in more than one way. Before we go into how to do this, understand that while Microsoft allows it, you won’t be offered the same level of support and aren’t entitled to receive any feature or security updates.
Perhaps ironically, Microsoft itself has provided a way to go around the TPM 2.0 requirement as part of the official Windows 11 documentation. That said, this method still requires that your system be compatible with TPM 1.2. As a rule of thumb, if your PC is equipped with an AMD Ryzen 1000 series CPU or newer, or an Intel 7th generation Kaby Lake CPU or newer, you should have support for TPM 1.2 or even TPM 2.0.

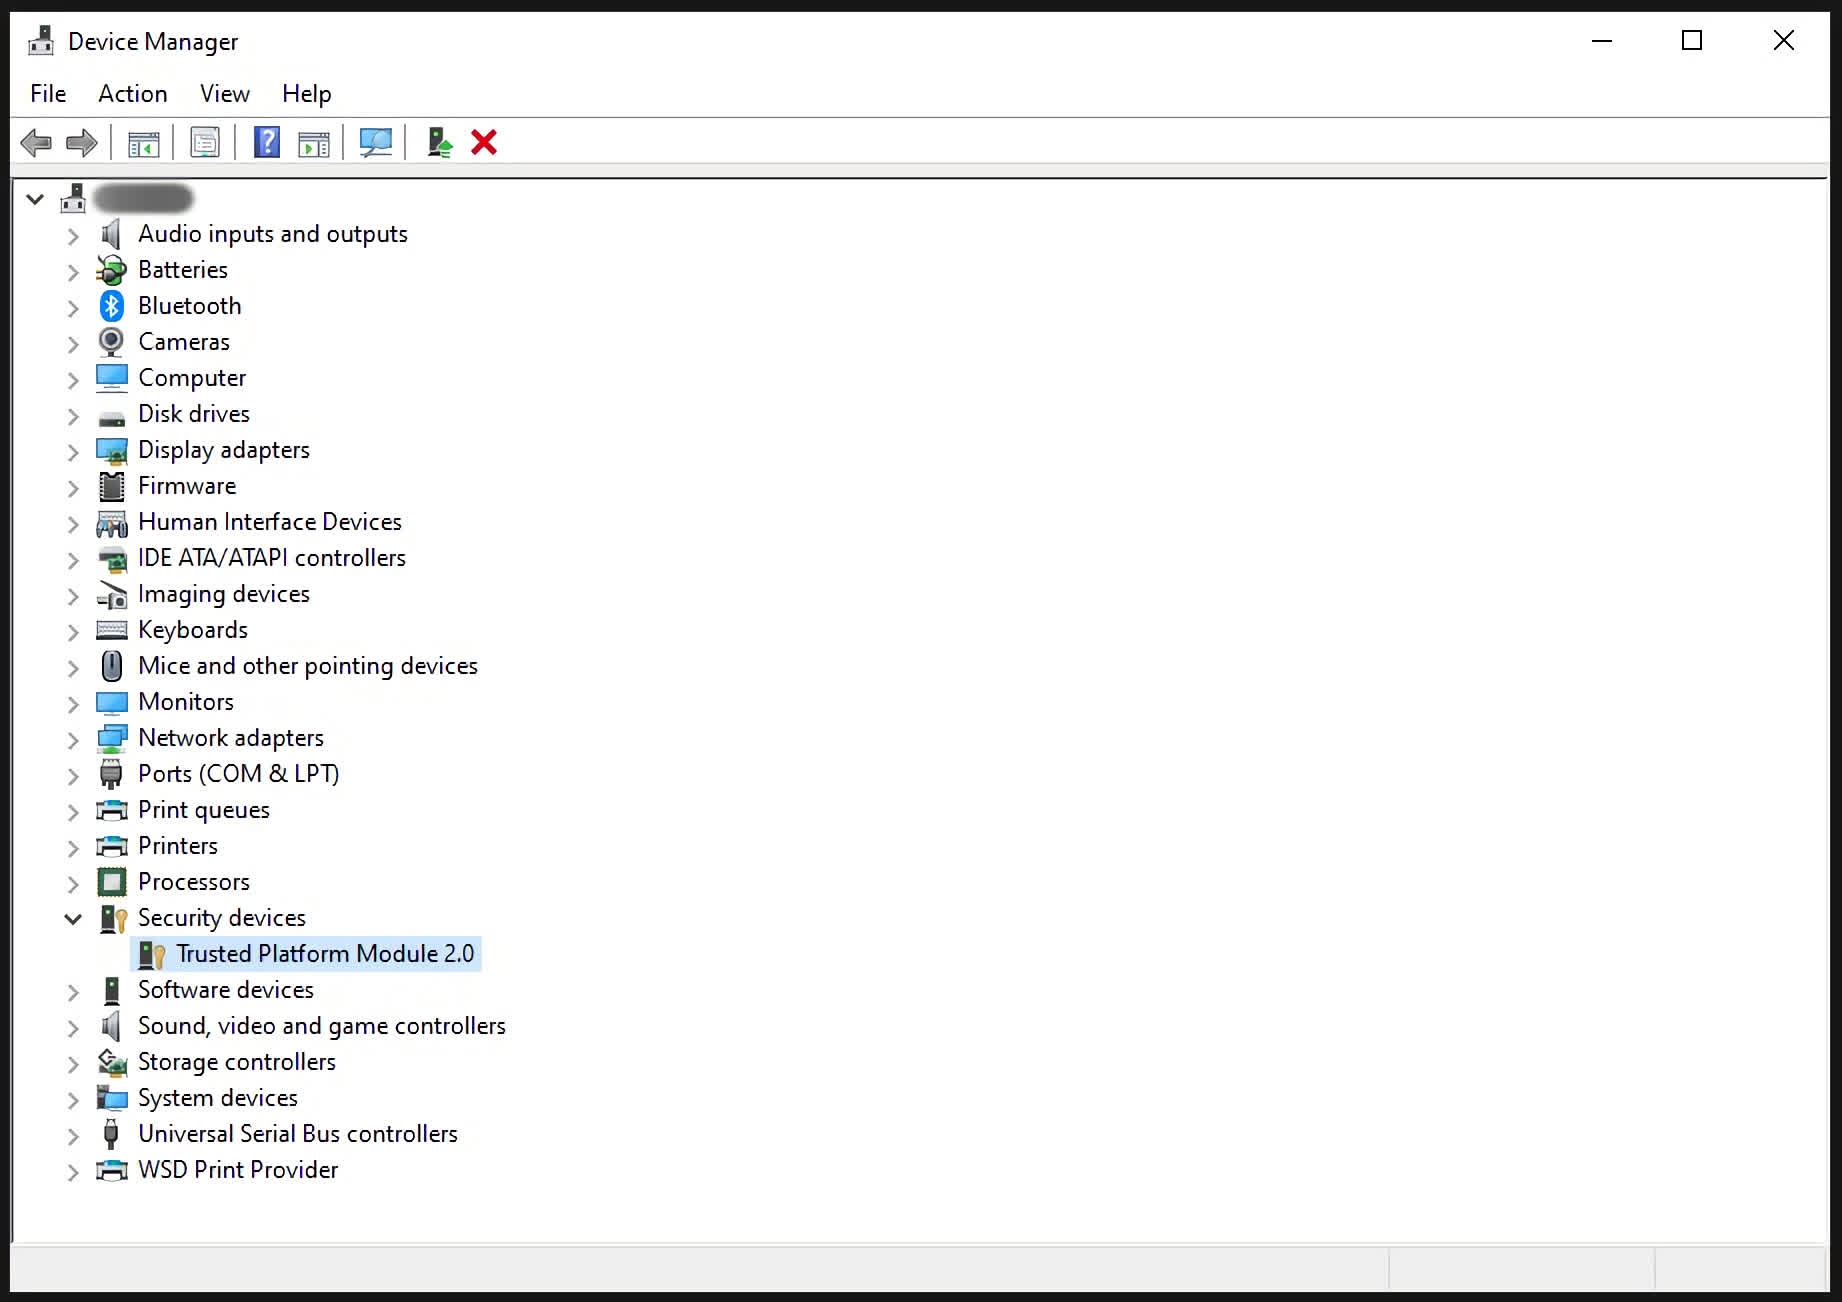
Checking for TPM 1.2 support is as easy as opening Device Manager and expanding the “Security devices” section. Alternatively, you can press Win + R on your keyboard to open the Run dialog. Type “tpm.msc” and hit OK to open the TPM Management snap-in, which should tell you right away if you have a compatible TPM module.
If you don’t see any mention of “Trusted Security Platform Module,” check your UEFI settings—usually found in the Advanced tab—and enable a feature called “PTT” for Intel systems and “PSP fTPM” for AMD systems. This setting will be necessary on most consumer PCs, where OEMs usually don’t enable this feature from the factory.

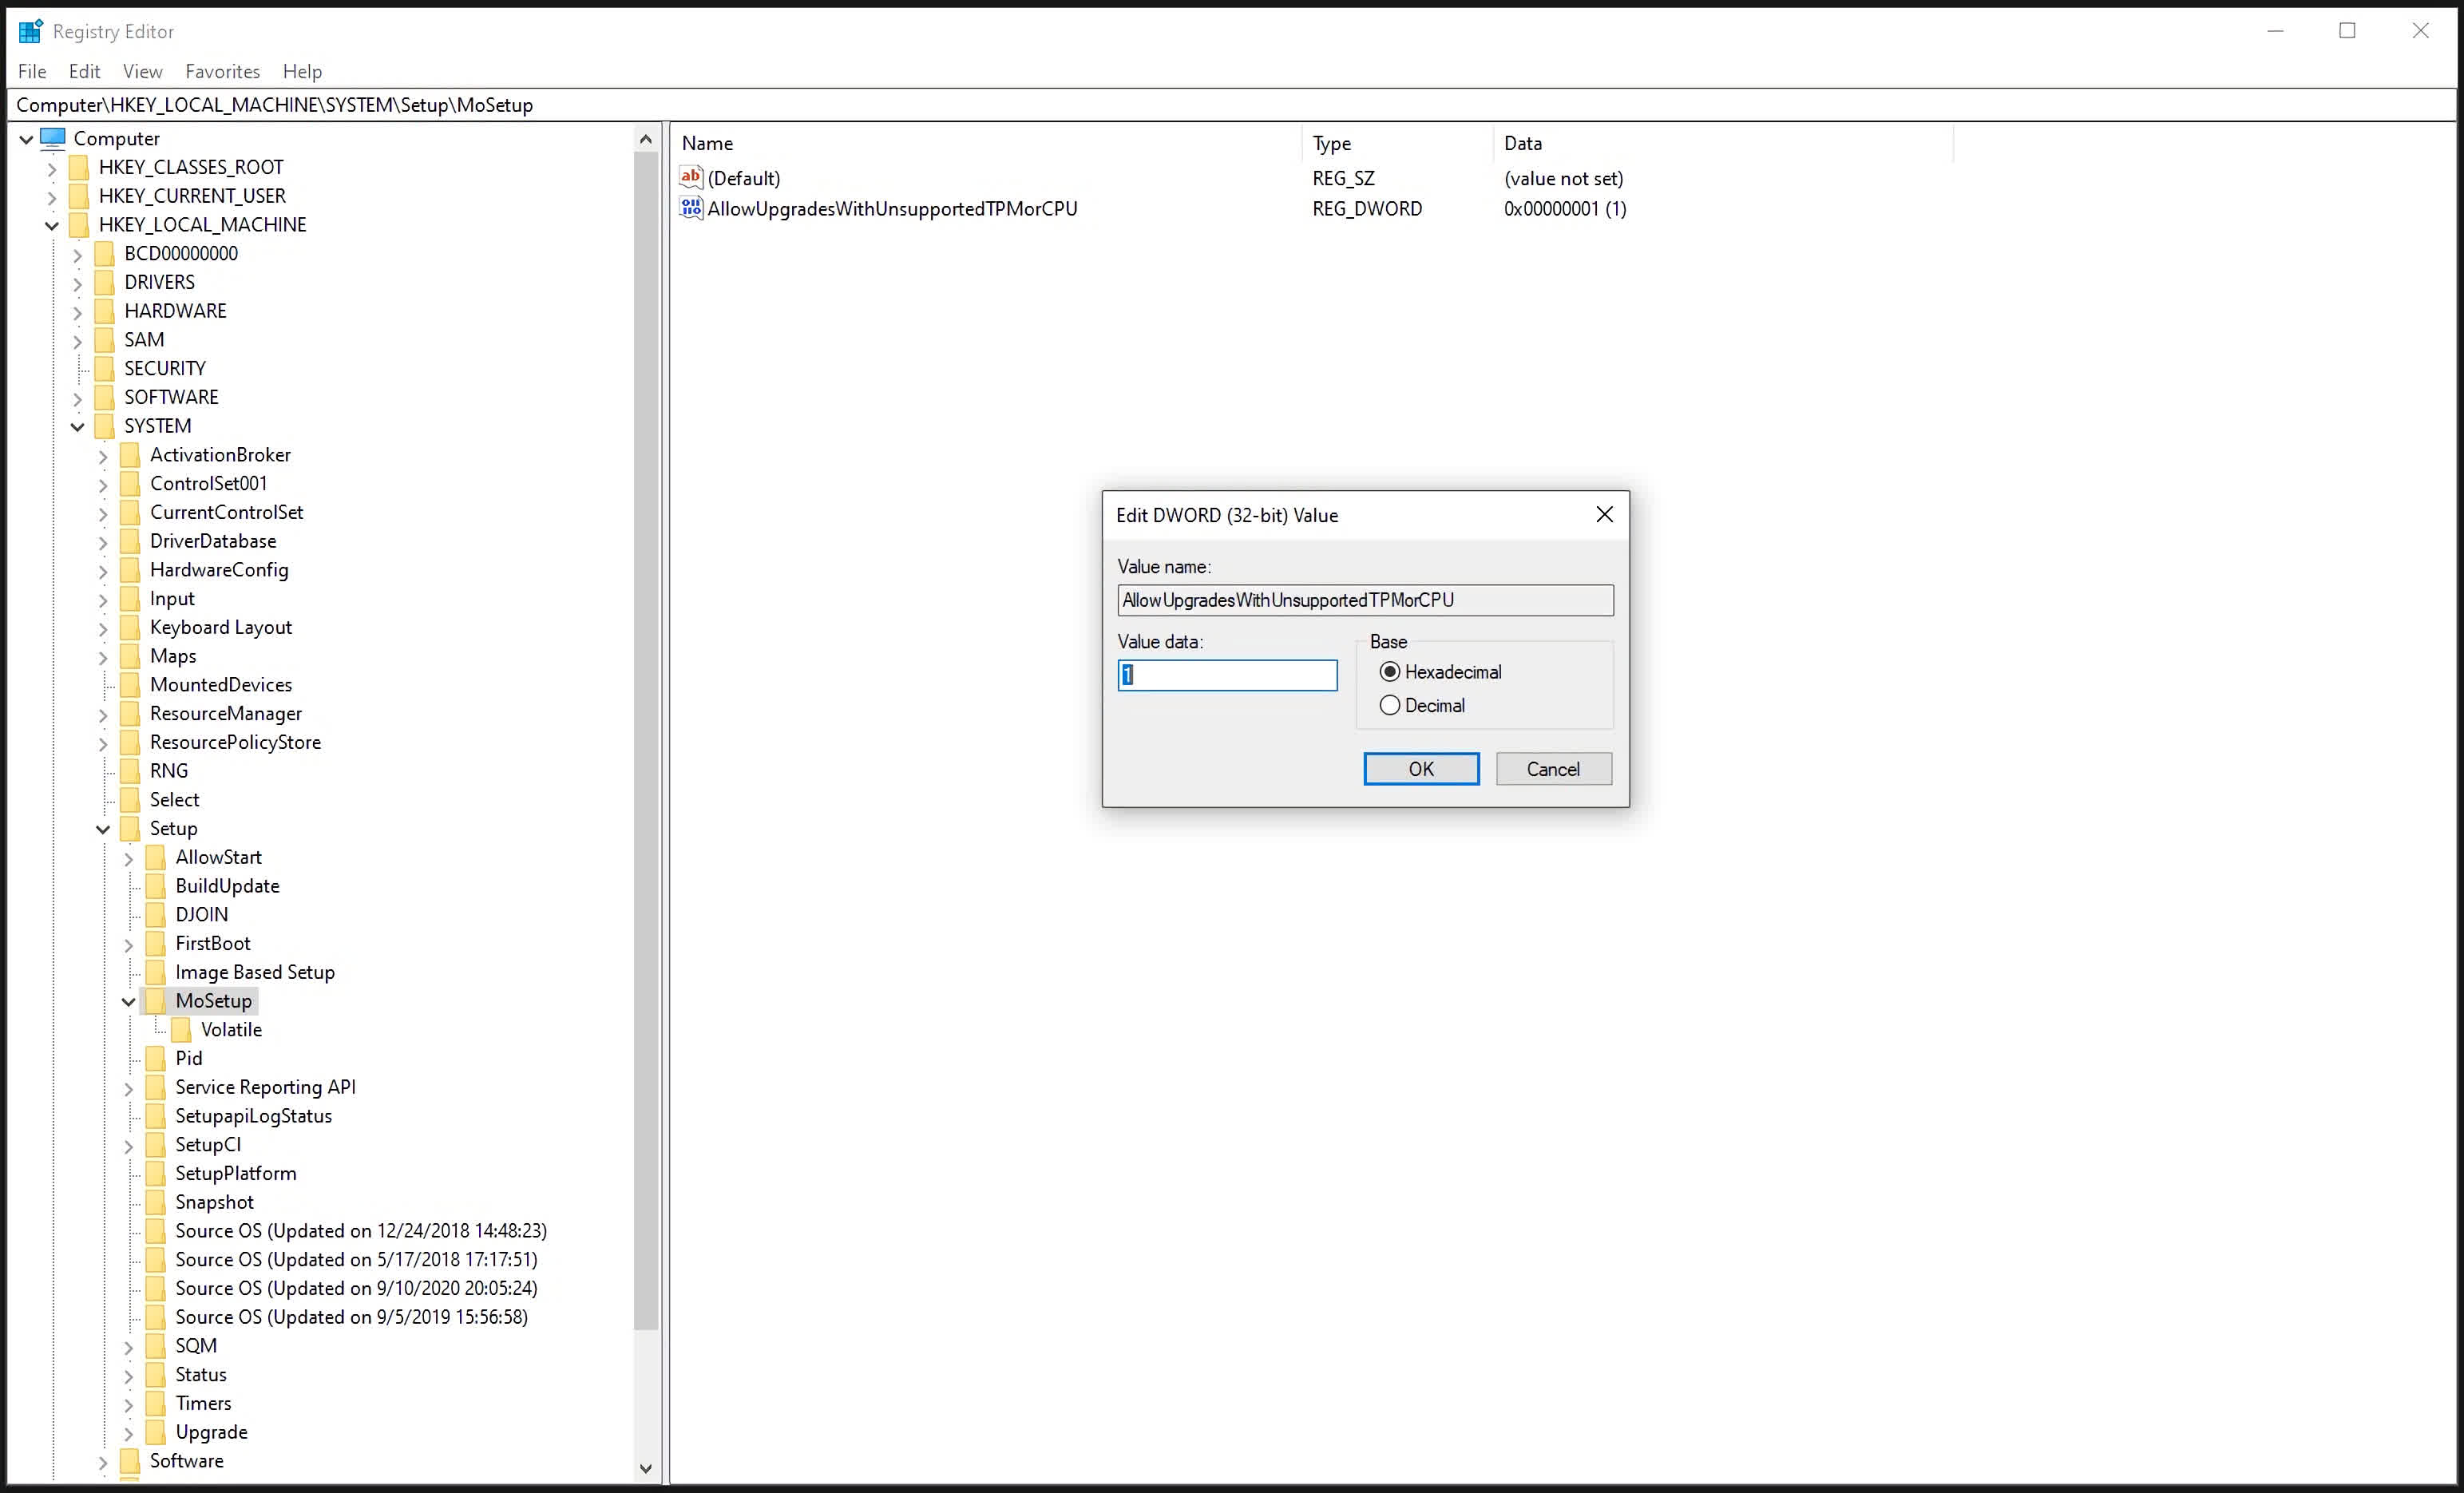
After adjusting the setting, you need to add a Registry key manually. To do that, search for “Registry Editor” from Start, and launch it. In the address box, insert “HKEY_LOCAL_MACHINESYSTEMSetupMoSetup” and press Enter. Add a DWORD value, name it “AllowUpgradesWithUnsupportedTPMOrCPU,” and set it to 1. Then create a bootable USB or DVD with the Media Creation Tool, launch setup, and perform an in-place upgrade on your system.
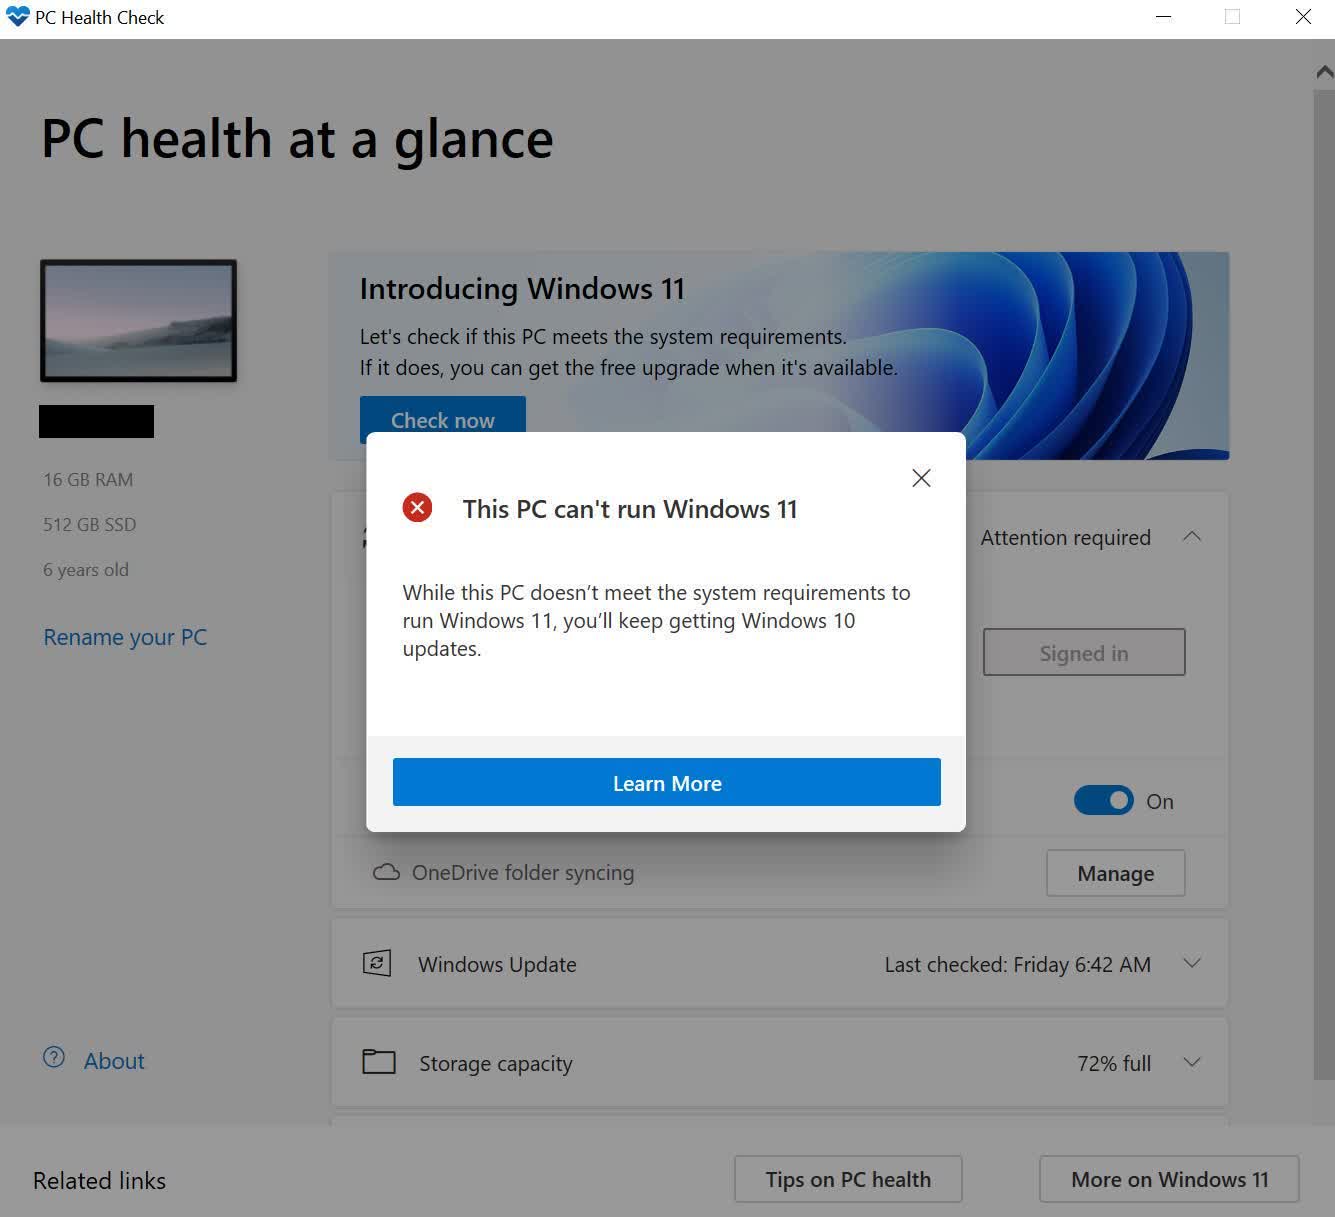
If you want to perform a clean install and use an even older CPU, you can also perform an unofficial bypass on the TPM and CPU checks during the Windows installation process. As you run through the required steps, you’ll quickly run into a message saying, “This PC can’t run Windows 11.” You’re going to prove the message box wrong by going back a step and then hitting Shift + F10 on the keyboard to open a Command Prompt window. Type “regedit” and hit Enter. Just like with the above method, it’ll open the Registry Editor. Type “HKEY_LOCAL_MACHINESYSTEMSetup” in the address bar and hit Enter. Right-click on Setup and add a new Key called “LabConfig.”
In the LabConfig Key, add a DOWRD value called “BypassTPMCheck” and set it to 1. Then add another one called “BypassCPUCheck” and set that to 1 as well. Repeat the same process with “BypassSecureBootCheck.” A word of caution, however, you might be tempted to try “BypassRAMCheck” or “BypassStorageCheck,” but it’s not worth it. If you don’t meet the minimum storage or RAM requirements, it’s better to stick with Windows 10 for now.
That’s all it takes to bypass the TPM and processor requirements and install Windows 11. Below you have shortcuts to Windows 11 downloads, reviews, and a couple of fixes for annoyances you may find in the new operating system:
- Windows 11 Compatibility Tool
- Windows 11 Installation Assistant Download
- Windows 11 Download (ISO)
- Windows 11 review round-up
- Features that make Windows 11 faster than Windows 10
- Play with Windows 11 in a web browser
- Windows 11 memory leaks & first day bugs
- Windows 11 known issues
- Disable VBS in Windows 11 for a performance boost
- Revert Windows 11 new right-click context menu

