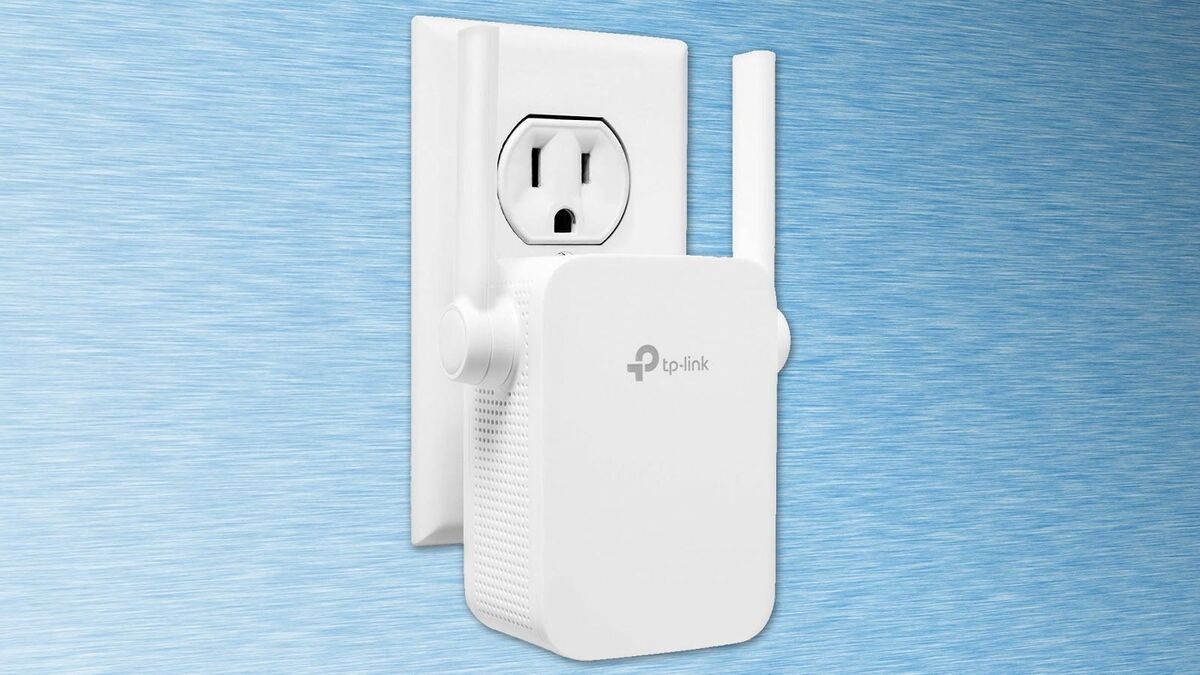
Setting up a Wi-Fi extender isn’t difficult, but there are some tips and tricks you need to know for maximum performance.
TP-Link
Today’s Best Tech Deals
Picked by PCWorld’s Editors
Top Deals On Great Products
Picked by Techconnect’s Editors
Show More
A Wi-Fi extender is a gadget that sucks in Wi-Fi signal, then spits it back out on the same network name and frequency. Think of it as a radio repeater, because that’s essentially what it is.
It’s a relatively easy and inexpensive way to extend your network into those hard-to-reach spots in your home, and much less expensive than a full mesh system. But setting it up isn’t always straightforward. Here are some basic tips on how to get started, and how to make the most of these handy devices.
Buying the right Wi-Fi extender
When buying a Wi-Fi extender, you want to make the most out of the connection you already have. So check your current Wi-Fi router — either the one that you got from your ISP, or the one you bought yourself and connected to the modem.
You’re going to want to match two values between the router you have and the extender you want to buy: the Wi-Fi generation, and the Wi-Fi speed. The generation will generally be either Wi-Fi 5 (802.11ac) or Wi-Fi 6 (802.11ax). The speed is expressed as a function of that connection: if the extender is marked as “AC750,” that means it’s using 802.11ac at up to 750 megabits per second. If it says “AX1800,” it’s using 802.11ax at up to 1800 megabits (1.8 gigabits).
You can buy an extender that’s newer and/or faster than your router, and it will work fine. But you’ll be paying for something that you don’t really need, since the extender won’t be able to speed up the connection from the router itself.
Where to put your Wi-Fi extender
Choosing where to place your network extender is essential. Ideally you want it close enough to your Wi-Fi router at the source to get the most stable connection, but far enough away that it will cover a large area that the router doesn’t cover.
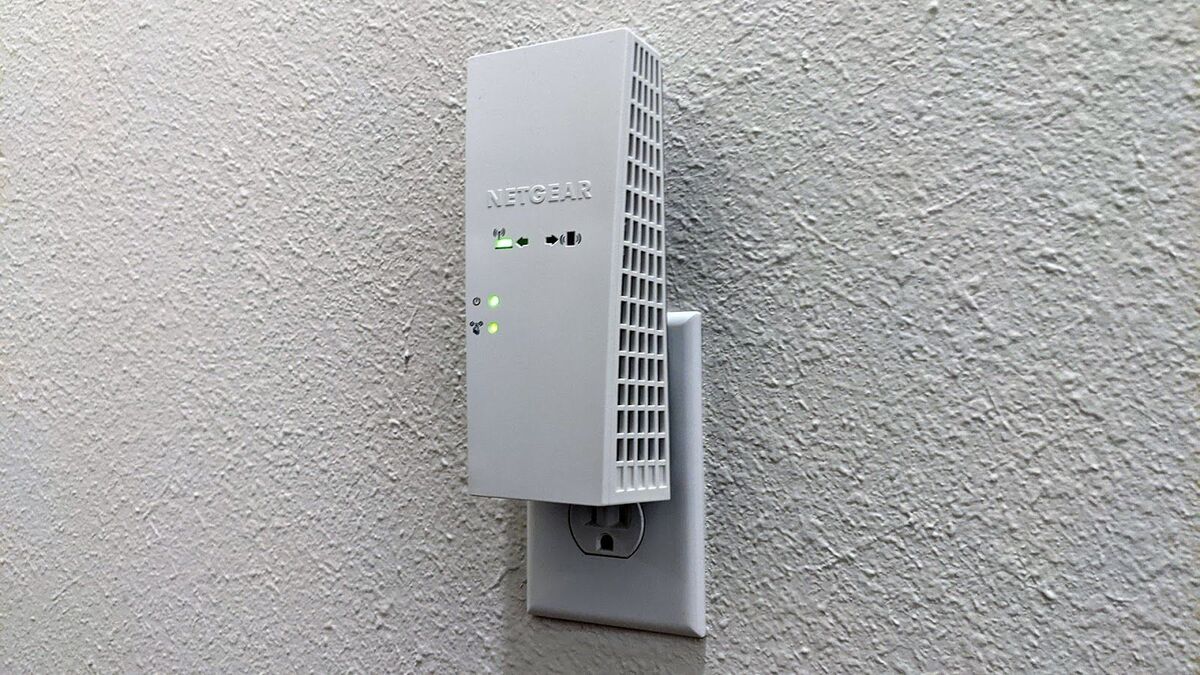
For example: if you live in a two-story house and your router is on the main floor in the living room, an ideal spot for the extender is plugged into an outlet at the top of the stairs. This will give it a fairly reliable, line-of-sight connection to the router, while rebroadcasting its wireless signal to the rooms on the second floor.
 Michael Crider/IDG
This outlet is in the middle of my halfway, between the router in the living room and the bedrooms.
If you’re using a Wi-Fi extender for just one user (say, to get a better signal for a home office PC), you’ll want to place it approximately between that user and the Wi-Fi router. If you want to connect to the extender over Ethernet (see the Connection section), you might have to fudge it and go farther.
Remember that once you’ve set up your Wi-Fi extender, you can move it around your home as needed. Feel free to experiment with placement to get the best, most reliable signal.
How to set up a Wi-Fi extender
Every brand of network hardware is a little different, and we can’t cover them all. Generally if you follow the instructions that came with your extender, you should be okay. That being said, there are usually two different ways to go about it:
Setup with a PC
This is the more technical way to set up your extender. Before we begin, write down the SSID (name) and password for your existing Wi-Fi network, if you don’t have them memorized. Do the same for the 2.4GHz and 5GHz networks, if they’re different.
You’ll need a desktop or laptop with an Ethernet cable for a wired connection, and the cable itself. (One probably came in the box with your extender.) If your computer doesn’t have an Ethernet port, you’ll need to connect to the default Wi-Fi network that the extender broadcasts, which is different from the one already in your home (at least for now.) This is usually “WIFI_EXTENDER” or something similar; check the instructions if it asks for a password.
 Michael Crider/IDG
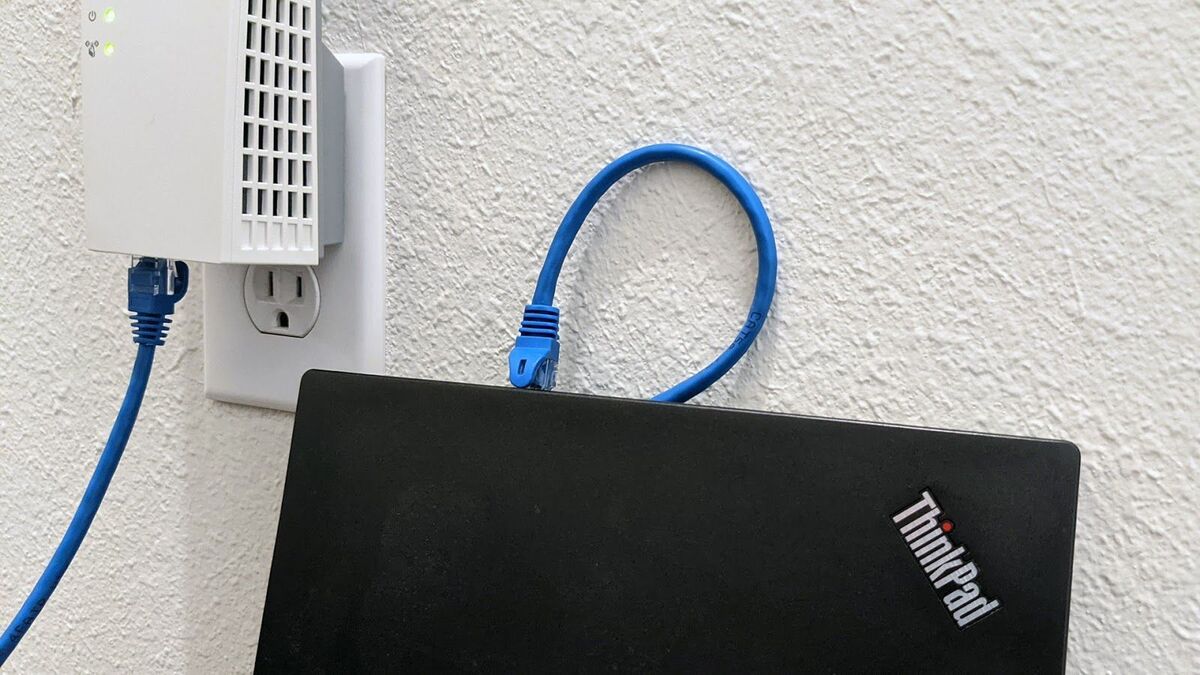
Connecting a laptop to the Wi-Fi extender.
Plug the extender into the wall, then plug the Ethernet cable into both the extender and your computer. Alternately, disconnect from your home Wi-Fi network and connect directly to the extender. Note that in both cases you’ll temporarily lose web connection. If there’s a switch on the side of your extender, make sure it’s set to “Extender” mode, not “AP” or “Access Point.” (AP is for connecting directly to your modem, which you don’t need if you have a Wi-Fi router already, or an all-in-one modem/router.) It may need a few minutes to boot up.
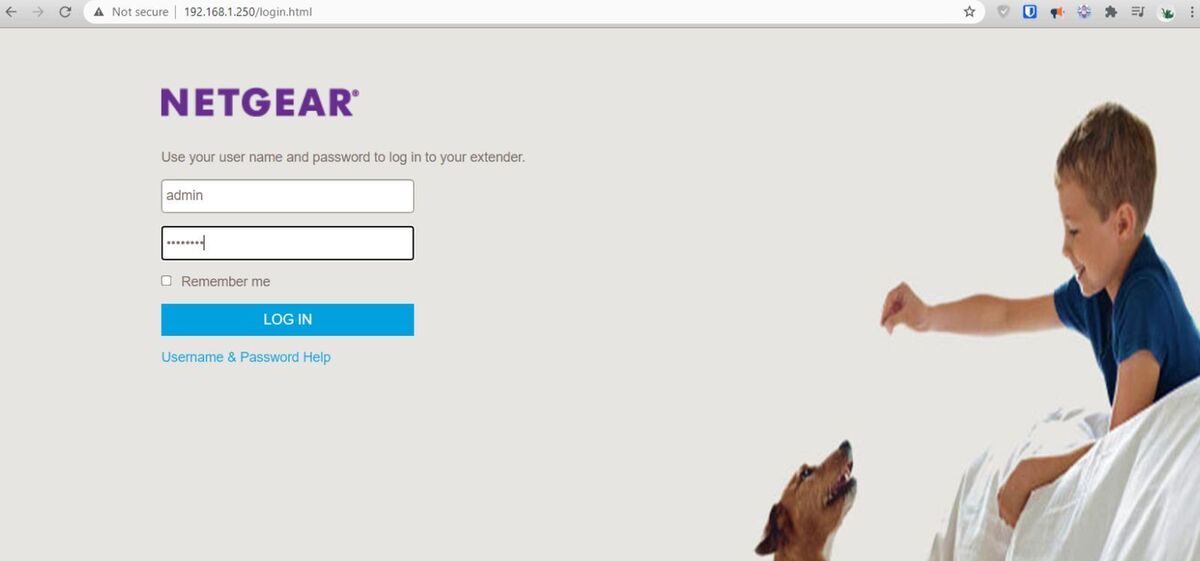
On your computer, open a web browser like Edge or Chrome. You’re going to use the browser to enter the extender’s web-based interface. The address for this interface is usually a simple numerical address on the local network, either 192.168.0.1 or 192.168.1.1. Try entering both of those in the URL bar; a login prompt should appear.
If neither of those addresses work, check the instructions that came with your extender or the sticker printed on its side; some brands use something a little different. My Netgear extender uses “www.mywifiext.net,” some Asus models use “repeater.asus.com,” et cetera. If you can’t find it, Google your repeater brand on your phone and add “login,” and you’ll probably find it soon enough.
 Michael Crider/IDG
Once you get to this page, you’ll need to log in with the default username and password. These are usually “admin” and “password,” respectively. Don’t worry, you can change them later in the extender settings menu. If the default name and password don’t work, try a factory reset of the device, which usually needs a button pressed with a pin or paperclip.
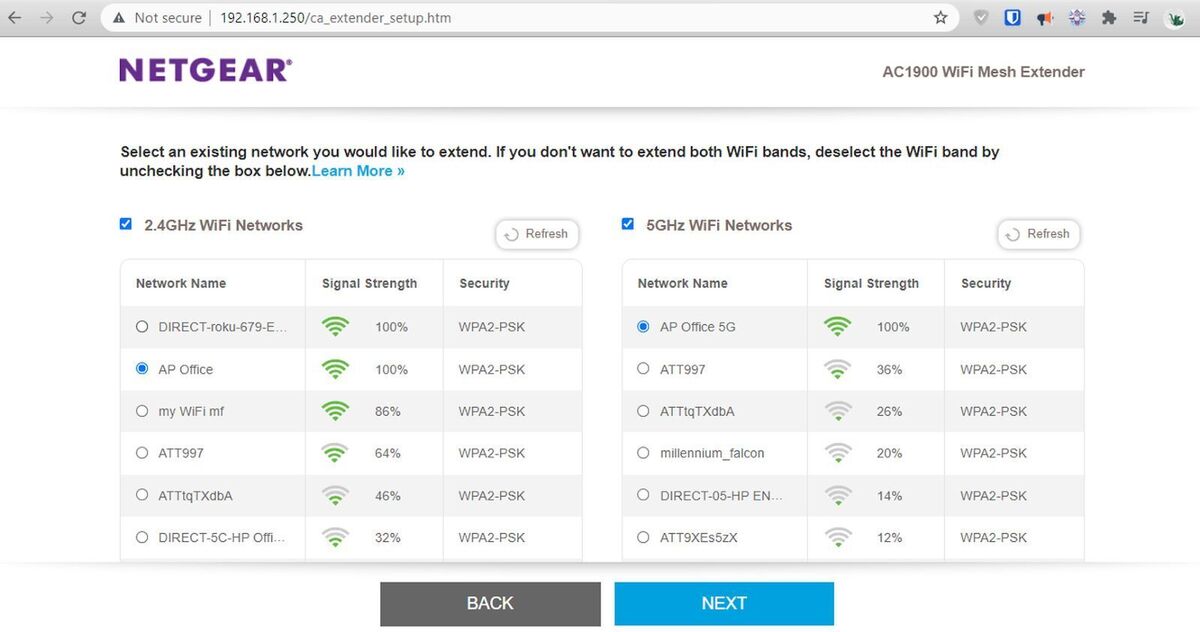
Once you’re logged into the repeater interface, it should start a wizard to guide you through connecting to your local network step-by-step. But if it doesn’t (for example, if you bought your extender used), here’s what you do:
 Michael Crider/IDG
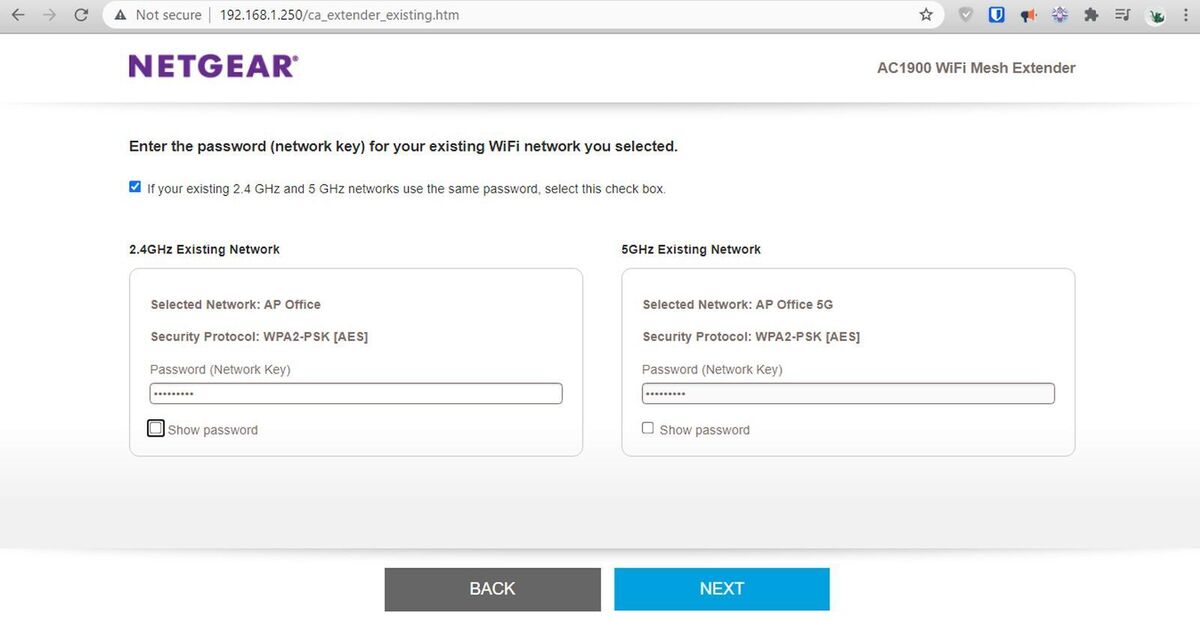
Find the Wi-Fi settings page for your extender, and enter the same name for the SSID and password as you use with your Wi-Fi router. What’s happening is that the extender is logging into your network via the router, just like you do with your laptop or phone. Once it’s logged in and the connection is stable, it will rebroadcast the same data connection on the same SSID throughout your home, allowing for easy connections via other devices.
 Michael Crider/IDG
Most modern extenders will have settings for both a 2.4GHz network and a 5GHz network. Again, just make sure that the SSID and passwords match the settings on your existing router.
Double-check that you have everything set up correctly, then click “save” or “apply,” and you’re ready to go. This may take a few minutes.
Setup with a phone or tablet
If you can connect to the extender’s Wi-Fi network with its default SSID and password, you can follow the same steps as above with your phone’s browser.
If you can’t, then download the appropriate helper app from the iOS App Store or the Google Play Store on Android. For my extender, this is Netgear Nighthawk. Your extender’s box will probably have a link or QR code with the corresponding app.
From here, you should have fairly straightforward instructions on how to set up your extender. Remember, all you really need to do is make sure it’s using the same Wi-Fi network as your existing router. Go through the steps on the app, which will be pretty similar to the ones for PC setup above, and save your settings. You’re ready to go.
Connection
Once you’ve completed the setup steps above, your extender is all set. Place it somewhere ideal in your home for coverage, and Wi-Fi devices like phones, laptops, and tablets will connect to it automatically. You should see green indicator lights for both power and wireless connection; if the connection light is orange or red, the device needs to be physically closer to the Wi-Fi router.
If you like, you can use the extender with a different SSID and/or password, but there’s no real benefit unless you want to connect specifically to the extender or the router and not the other device.
If you’re using your extender for a wired device, like a desktop PC or a game console, plug the Ethernet cable into the extender and then the device itself.
That’s it, you’re ready to rock!
Note: When you purchase something after clicking links in our articles, we may earn a small commission. Read our affiliate link policy for more details.


